
Treasured holiday decorations that combine the craft of embroidery with festive customs are cross stitch stockings. In addition to holding holiday treats, these handmade items become cherished keepsakes that are passed down through generations.
Origins of Cross Stitch and Christmas Stockings
The Art of Cross Stitch
Using X-shaped stitches on fabric to create patterns or images, cross stitch is an ancient form of embroidery. The intricacy and style of this technique have progressed through the ages, adorning everything from clothing to decorative items and even household linens. Archaeological finds point to ancient Asian, Middle Eastern, and European civilizations as practitioners of cross-stitch.
The Tradition of Christmas Stockings
Legend has it that the patron saint of children, Saint Nicholas, is the one from whom the practice of hanging stockings during Christmas first emerged. Santa Claus supposedly overheard a man lamenting the fact that he was unable to provide dowries to his three daughters after his wife died. Nicholas helped out by tossing gold coins down the chimney, which landed in the drying stockings by the fireplace. The custom of hanging stockings to receive Christmas gifts originated from this story.
Combining Traditions
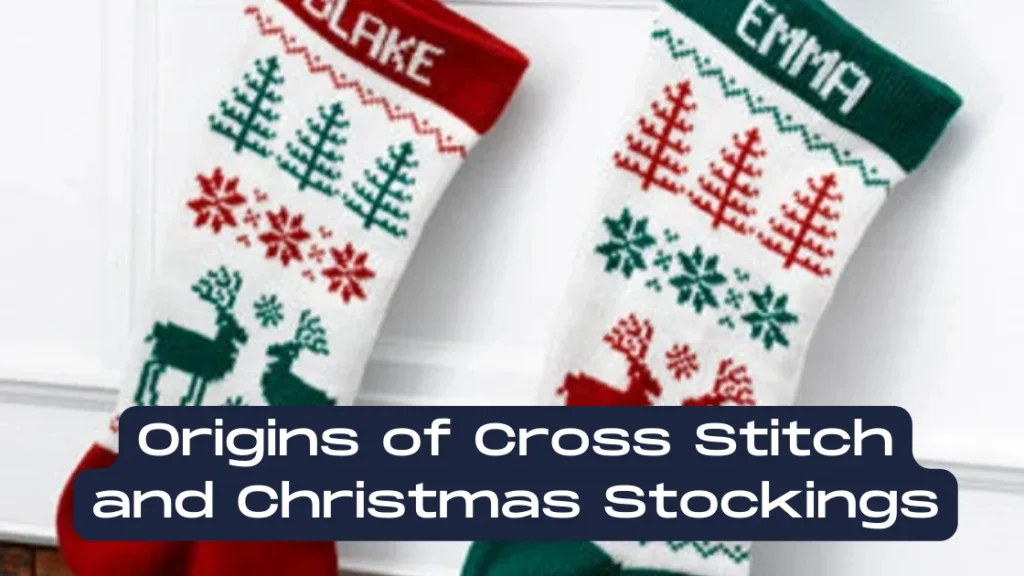
You can make unique and lovely holiday decorations by combining the skill of cross stitch with the age-old practice of making stockings. You can personalize these stockings with names or motifs that hold personal significance, and they often feature festive designs. They are unique additions to holiday decor.
Designing Your Cross Stitch Stocking
Selecting the Perfect Pattern
The initial stage in making a cross stitch stocking is to select a pattern. Santa Claus, reindeer, and other religious symbols sit alongside more secular ones, such as nativity scenes, in the designs. Novel designs can also be sparked by one’s own passions, pastimes, or beloved fictional characters. You can find patterns in craft books, on the internet, or even make your own with cross stitch software.
Gathering Essential Materials
You will require the following materials to begin your cross stitch stocking project:
Aida cloth is a popular choice because of its even weave, which makes it easy to sew evenly spaced stitches.
multi-colored embroidery floss usually crafted from silk, cotton, or metallic fibers.
For cross stitch, blunt-tipted tapestry needles work best.
A charted design to follow while stitching is called a pattern.
The material used to make the stocking’s back, often felt or velvet.
An optional lining can be added to the garment to make it more durable and to hide the embroidery’s reverse side.
Personalizing Your Stocking
Making your stocking more unique is as easy as adding some personal touches. Take into account:
Companies Using Their Names: An extra special touch is the stitching of the recipient’s name.
Pick Designs with Meaningful Motifs: Think about what the recipient enjoys doing in their free time.
The use of Favorite Colors: Make use of the colors that the recipient loves the most.
The Crafting Process: Step-by-Step
Preparing Your Materials
Get your Aida cloth out and cut it to size, leaving a little extra for finishing. To maintain tautness while you work, fasten your fabric to a hoop or frame. To get neat stitches and a professional look, this is an essential step.
Stitching the Design
Locate the pattern’s center and begin cross-stitching there. You can find this mark on your cross-stitch chart; it will help you center your design on the fabric. Stitch with two strands of embroidery floss, maintaining consistent tension and size of stitches.
Assembling the Stocking
Once the stitching is finished, the stocking can be assembled:Forming the Cut: With a seam allowance, cut your stitched fabric into stocking shape.
To finish the stocking, cut a length of backing fabric that matches its shape.
Sew the Pieces Together Match the wrong sides of the stitched piece and the backing fabric and sew around the edges, making sure to leave the top open.
To make it look more polished and long-lasting, line it with fabric that will hide the embroidery’s reverse side.
After you’ve turned the stocking inside out, use an iron to smooth out any wrinkles in the seams.
Time Investment: Crafting with Care
Time needed to finish a cross stitch stocking is proportional to the difficulty of the design and the skill level of the stitcher. If you work on complex patterns occasionally, it could take you months to complete them. Planning ahead is key, but it’s especially important if you want to finish the project before the holidays.
Purchasing Kits vs. DIY Designs
Quick and easy cross stitch stocking kits are available for newcomers or people who just want a little more ease. Typical components of such kits consist of cloth, thread, needles, and patterns. But, in order to use higher-quality supplies, personalize colors, or work with unique fabrics, some crafters choose to source materials separately.
Finishing Techniques for Cross Stitch Stockings
A cross stitch stocking takes time and careful attention to detail to finish, but the end product is worth it.
Blocking the Finished Embroidery
The stitched fabric must be blocked in order to set and straighten it:When you’re ready to block your embroidery, gently soak it in lukewarm water until it’s completely saturated. Roll the item in a towel to soak up any extra water.
While the embroidery is still wet, shape it according to your specifications by stretching and pinning it to a blocking board. Before moving on, make sure it’s completely dry.
Assembling the Stocking
Both practicality and visual attractiveness are guaranteed by correct assembly:Forming the Cut: Using the blocked embroidery as a guide, trace and cut out the stocking shape, making sure to leave a seam allowance.
Cut matching pieces of fabric for the lining and backing. Sew along the edges, leaving the top open, after aligning the embroidery with the lining, right sides together. Use the backing fabric in the same way.
When putting the pieces together, make sure the right sides of the backing and the lining-embroidery piece meet. Sew a hem around the top of the stocking, and then invert it.
Adding Decorative Elements
Add finishing touches to make the stocking more appealing:Sew a loop for hanging and attach a fabric cuff to the top.
To make it more festive, you can add trims, beads, or sequins.
Customization Ideas for Cross Stitch Stockings
Putting a special touch and a personal touch on your stocking makes it more special.
Incorporating Names and Initials
The stocking becomes one-of-a-kind when the lucky recipient has their name or initials stitched into it.
Thematic Designs
Pick patterns that represent your interests and hobbies, like your favorite sports, animals, or seasonal symbols.
Color Schemes
Choose hues that complement the recipient’s taste or their current Christmas décor.
Using Vintage or Heirloom Fabrics
Make a treasured memento by incorporating materials that hold sentimental value.
Cross Stitch Stocking Kits
Convenience seekers can find a complete solution in kits.
Contents of a Typical Kit
Linen or Aida cloth that has been pre-cut.
Embroidery floss that has been pre-sorted is used for the thread.
Needles of the right size for tapestry.
Comprehensive instructions and diagrams.
Benefits of Using Kits
All the materials are included in the kit, which makes it easier to craft and guarantees that the colors will match.
Considerations When Choosing a Kit
and the complexity of the design before purchasing.When Choosing a Kit Assess the design complexity, quality of materials, and whether the kit matches your skill level.
Alternative Uses for Cross Stitch Stockings
Think about these innovative uses beyond traditional hanging:
Decorative Displays
Swap out your stockings for some new wall decor or mantel accents.
Gift Packaging
Put a personal touch on little presents by placing them in mini cross stitch stockings.
Advent Calendars
Make a one-of-a-kind advent calendar out of a string of little stockings, with each one symbolizing a day closer to Christmas.
Frequently Asked Questions
How do I transfer a cross stitch pattern to fabric for a stocking?
Most patterns are designed for counted cross stitch, eliminating the need for transfer. Align the fabric and pattern grids to guide your stitching.
What is the best fabric for a cross stitch stocking?
Aida cloth is popular due to its even weave, but linen offers a finer texture for experienced stitchers.
How long does it take to complete a cross stitch stocking?
Completion time varies based on design complexity and stitching speed, ranging from weeks to months.
Can I machine wash a cross stitch stocking?
Handwashing is recommended to preserve the embroidery and prevent damage.
Where can I find free cross stitch stocking patterns?
Online crafting communities and websites often offer free patterns for personal use.
Also Read: Aqua Stockings: The Perfect Blend of Style, Comfort, and Elegance
Conclusion
Making a cross stitch stocking is an enjoyable project that blends artistic expression, technical proficiency, and historical practice. The end product of your handiwork, whether it’s for yourself or a loved one, will be an heirloom-quality, one-of-a-kind treasure. You can bring a little more love and coziness into your holiday gatherings by hanging your handmade stocking by the fireplace.

Lois Snyder is a versatile writer with experience across multiple domains. She crafts engaging and informative content, delivering valuable insights and captivating readers with her expertise and passion for diverse topics.